
It is always recommended to consult with your architect, golf course builder, or physical engineer to determine best practices.
There are a few basic theories concerning how best to arrange Sandtrapper in a bunker. For most, the objective is to minimize seams and to use as many continuous segments as possible. For others, the focus is on minimizing product waste. There are a number of trade-offs to consider when organizing for product placement.
For those looking to have the fewest seams possible, the 90” roll width helps to acheive this objective. The wider roll widths speed installation (reduced cutting and stapling time/cost) but will lead to an increase in product waste. Waste can be best described as remnant segments that cannot fit (or be used) in the smaller corners/parts of the bunker.
Further minimizing of seams can be addressed by orienting the roll/segment (either 56” or 90” width rolls) down the longest length of the bunker (normally placed in the middle) and work the next segments alongside and outwards to cover the bunker.
For those looking to reduce material waste, this can be acheived by using the 56” roll width and by incorporating smaller segments where they will fit. Since Sandtrapper is a non-woven material, there is no orientation that you need to match from one segment to another.
Smaller segments will produce more seams, creating the need to use more sod staples along those seams. It’s recommened that if small segments are to be used, that the segments are no smaller than 10 square feet or that the segments are not less that 2 feet in width. This allows for better securing with sod staples.
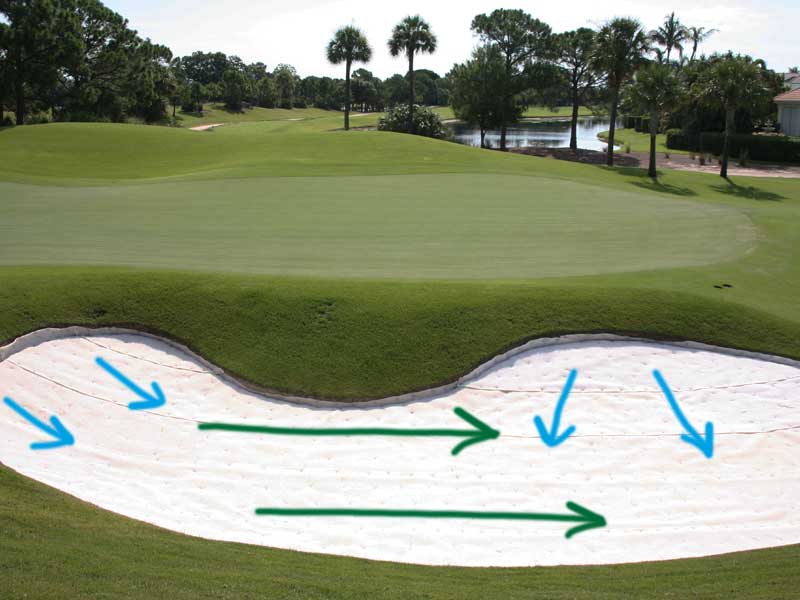
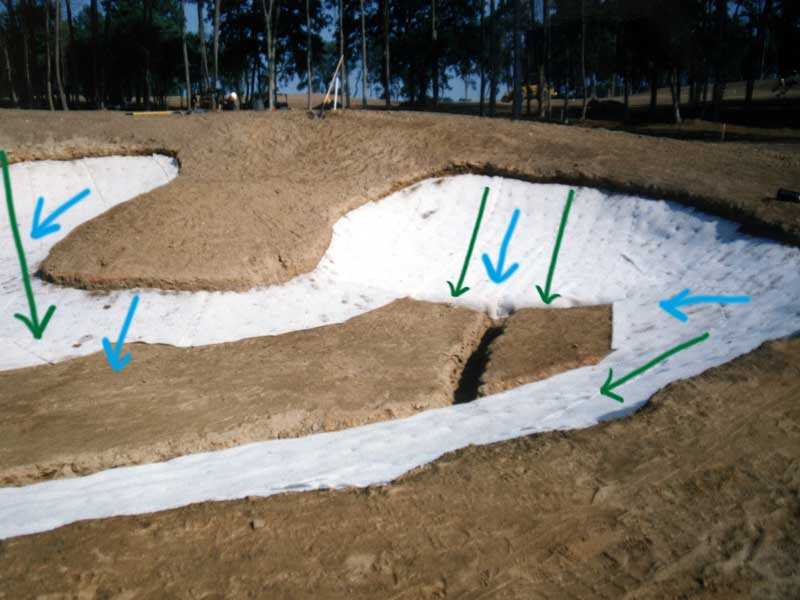
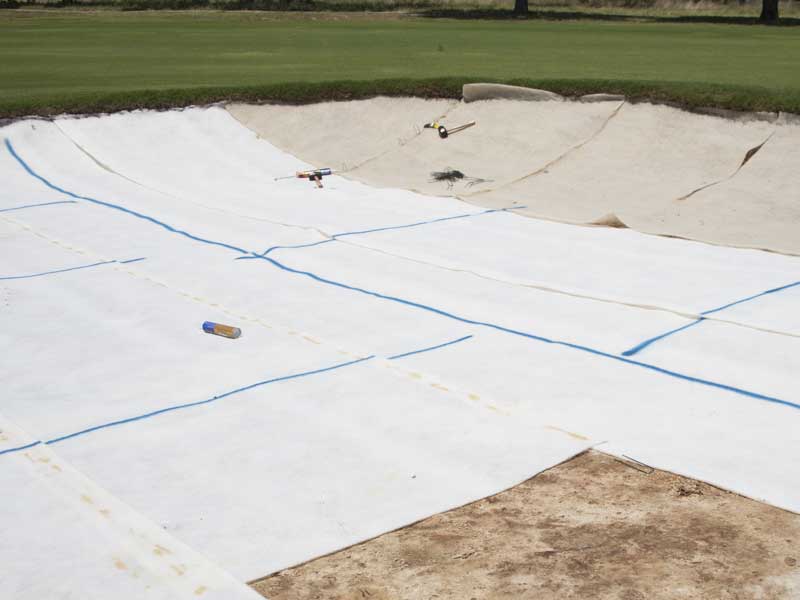
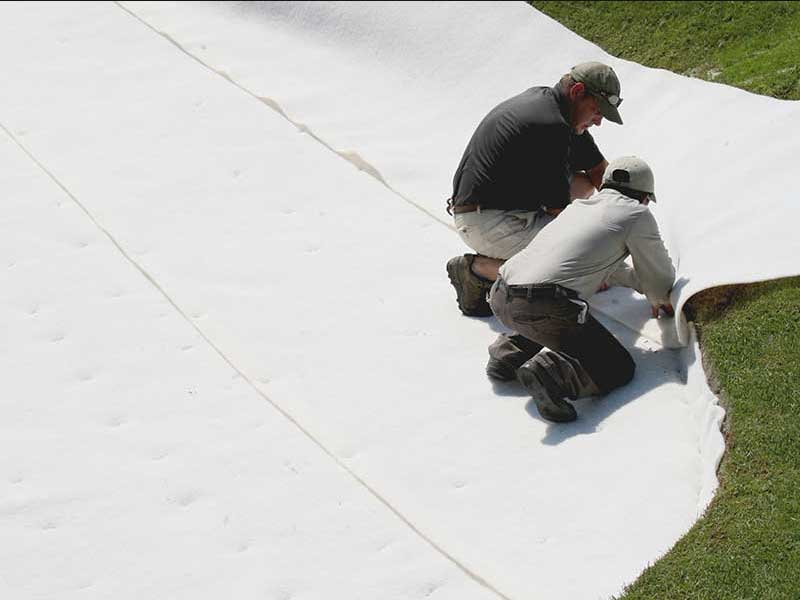
Sandtrapper can be installed in either case with no effect on performance. The images below illustrate two different installations where each method was used. Given the wide range of bunker styles and shapes, it’s possible to have both parallel and perpendicular allignment in the same bunker. NOTE: The blue arrows reflect bunker slopes and the green arrows show product orientation.

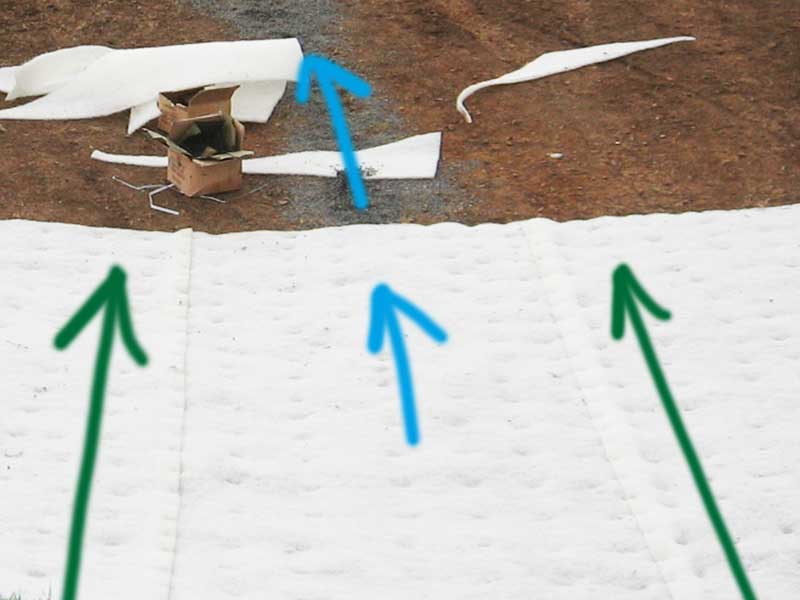
We recommend that seams between Sandtrapper segments be overlapped 2”-3” so that the securing sod staple will be driven through both segments. Increasing the overlap is acceptable and does not change performance. With regards to overlap, some prefer to place Sandtrapper much the way one would shingle a roof, with the bottom segment at the base and working upwards. Each successive segment would then be placed and overlapped on top of the previous/lower segement.
Some prefer to consider the angle to the hole or angle of play. In this case, the concern is to avoid the leading edge of the upper Sandtrapper layer being exposed to the club face. If the seams are perpendicular to the angle of play, the ideas is to have the overlap point towards the hole or angle of play.
Although the recommended sand depth of 4” to 6” adequately covers any seams, the question has been raised. Some choose to avoid overlap completely by butting seams together and applying construction adhesive to the seam. NOTE: Construction adhesive works well in these cases but does increase installation costs.
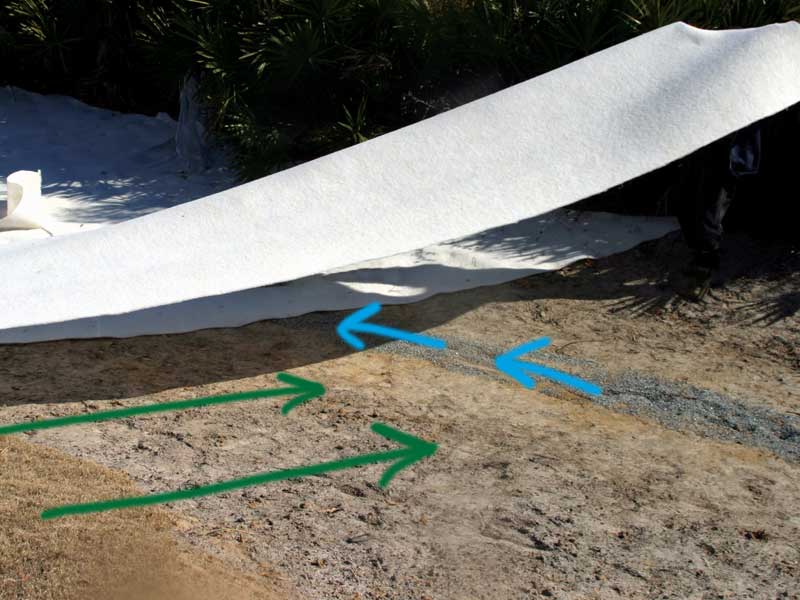
In order to better secure Sandtrapper, it is recommended that placing seams directly over drainage lines be avoided. This applies specifically to cases where Santrapper is alligned parallel to the main drain line. It’s recommened that you position Sandtrapper over the drain line so that there is adequate area to secure the liner onto either side of the drainage trench. If the seam runs parallel and down the line, directly over the line, you will not be able to effectively secure the seams into drainage system gravel.

Sandtrapper II - (PDF)
Sandtrapper MD - (PDF)
Sandtrapper I - (PDF)
Sandtrapper SL - (PDF)
Geotextile-JM Evalith - (PDF)
Product Comparision Sheet (PDF)
Bunker Preparation (PDF)
Drainage Planning (PDF)
Product Allignment (PDF)
Edge Detail (PDF)
Product Estimating (PDF)
Fasteners (PDF)
Enhanced Techniques (PDF)
Images here
Video here

US Toll Free Telephone
(888) 970-5111
Contact Form here